A Resource Guide for Bay Area Homeowners

Home Maintenance

Keep your home functioning smoothly by following home maintenance best practices. Photo: FC Remodeling ©2019


Keeping your home well-maintained can add to its value and save you money in the long run. But it can be hard to decide when to take on a home maintenance project yourself and when to bring in a professional. Read on to find the answers to your home maintenance FAQs.

Shares

Get Started

Maintaining Your Home

  • Should You Hire a Handyman?

    Handyman

    Find out when to hire a handyman to perform a home maintenance task and when to bring in a contractor.

  • 5 Important Health Checkups for Your Home

    Inspections

    Learn more about how annual inspections can help your home's systems run better for longer.

  • A Top-Down Approach to Home Maintenance

    Roof Maintenance

    Read on to learn what aspects determine a roof’s long-term health and performance.

Find Professionals

Research

Maintenance Tips from Diamond Certified Experts

Leila Jacobsen

Awnco Retractables

Dennis Thompson

Thompson Construction, Inc.

Lamine Elabed

LW Construction & Handyman Services

Scott Sunkel

Start Fresh Restoration

Frank Canova Jr.

Diablo Valley Cabinetry

Scott Duncan

Duncan Plumbing Ent., Inc.

Dave Steely

Maximum Carpet Cleaning

Paul Nazarian

McDecor Inc.

Steve Spratt

HPS Palo Alto, Inc.

Gifford Teeple

A Reliable Handyman

Tom Nolan

California Shower Door Corporation

Dane Marcy

Kelly’s Appliance Center

Daniel Gagne

Benjamin Franklin Plumbing

Dominic Capito

Elite Plumbing Services

Chad Wolffe

Vulcan Garage Services Inc.

Moshe Spund

FixEm Appliance Repair

How to Properly Maintain Window Awnings

How to Properly Maintain Window Awnings

SAN RAFAEL — When it comes to window awnings, regular maintenance is crucial for keeping them looking and performing their best. Awning maintenance mainly consists of routine cleaning, which prevents dirt from becoming embedded in the fabric. In addition to regularity, however, it’s important to use correct procedures when cleaning an awning.

After brushing off any loose dirt, apply a cleaning agent, which can range from a mild detergent or dish soap to a solution of vinegar or ammonia. Apply the solution with a sponge or soft bristle brush. If there are a lot of stains, add a little bleach or ammonia to the solution—it won’t hurt the acrylic fabric.

When cleaning an awning, it’s important to be careful of the stitch line, which sits on top of the fabric. The threading can break if you scrub it too vigorously, so either scrub gently or go around it.

After scrubbing, allow the cleaning solution to sit and soak in the fabric for several minutes before rinsing. While a thorough rinsing is important, using a pressure washer is discouraged because it can be too harsh on the fabric. After cleaning, allow the awning to air dry completely before returning it to its place.

How to Fix a Swinging Door

How to Fix a Swinging Door

HEALDSBURG — If you have a door that frequently swings open or closed, you may think the only way to fix it is to completely remove and reset it. However, in many cases, this problem can be corrected with a quicker, easier solution.

After closing the door, remove the pin from one of the hinges—use a hammer to tap the pin upward from below and then pull it out the top. Place the pin on a piece of wood or another hardy surface and use the hammer to give it a slight bend in the middle. Next, return the pin to its hinge.

While this may seem ridiculously simple, it should create enough resistance to keep the door from swinging. Depending on the extent of the issue, you may have to repeat the step with two or even all three pins, but in most cases this should solve the problem.

Fixing Low Water Pressure in Your Faucets

Fixing Low Water Pressure in Your Faucets

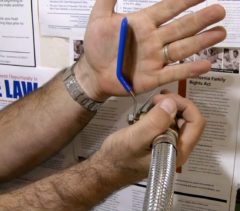
AMERICAN CANYON — If you’re getting unusually low water pressure from a faucet in your home, it’s likely due to a simple cause. Faucets have aerators, which act as filters that reduce water flow while maintaining a reasonable amount of pressure. Over time, aerators can collect tiny bits of sediment that come out of the water pipe. Eventually, this accumulated sediment can clog an aerator and cause a reduction in water pressure.

Fortunately, the solution for this issue is as simple as the cause. All you need to do is unscrew the aerator from the faucet, clean out any sediment inside and tighten it back into place. Once the aerator is clear of sediment, you should notice an improvement in water pressure.

Keep in mind that if the aerator is tightly fastened onto the faucet, you may need to use a wrench to remove it. However, you shouldn’t need a wrench to screw it back into place—hand-tightness should be adequate. If you think your aerator is defective, you can purchase a new one at your local hardware store. Aerators are very inexpensive, so don’t hesitate to replace them if necessary.

How to Remove a Recurring Carpet Spot

How to Remove a Recurring Carpet Spot

WALNUT CREEK — A common phenomenon experienced by those with carpet in their homes is a spot that continues to reappear, even after repeated cleanings. Fortunately, this isn’t a hopeless situation: by using the correct technique, you can eliminate a recurring spot once and for all.

The first step is to remove any soil currently present in that area of the carpet. Using a warm, wet, wrung-out towel, work from the outside of the spot toward the middle, wiping in one direction all the way around. Intermittently alternate to cleaner sections of the towel as you go.

Next, using a mister filled with a 50/50 solution of vinegar and water, spray over the surface of the spot and wipe again, this time with a dry towel. Be sure to use a towel that won’t bleed (preferably white cotton). Wipe using the same motion as before, in one direction, all the way around the spot. This will neutralize any residual chemicals left over from prior spot cleanings.

Lastly, you’ll want to rinse the vinegar and water out of the carpet. To do this, get a new, wet, wrung-out towel and, using the same motion as in previous steps, wipe all the way around the spot. This should permanently stop the spot from reappearing.

Tips for Maintaining Kitchen Cabinets

Tips for Maintaining Kitchen Cabinets

SAN RAMON — If you’ve recently had new kitchen cabinets installed, you’ll want to be proactive about maintaining them. This primarily consists of two aspects: cleaning and repairing minor damage.

Cleaning

Water, grease and food particles can cause damage to wood cabinets over time. Here are some tips for preventing this:

• Promptly wipe up spills with a microfiber cloth. Avoid using paper towels—due to their abrasiveness, they can damage your cabinets’ finish if used recurrently.

• To remove grease and food particles, use a mild cleaning product that’s appropriate for wood cabinetry.

• Don’t hang hand-drying towels over your cabinets—these tend to hold a lot of moisture, which can get transferred to the cabinetry.

Dent and ding repair

Minor dings, dents and scratches inevitably happen with wood cabinets. Fortunately, most can be easily repaired using a cabinet touch-up kit. These kits usually come with a putty stick and a marker, which can be used to fill in dents and scratches and blend in the color. This allows you to “erase” minor blemishes and keep your cabinets looking pristine.

How to Replace a Water Heater Anode Rod

How to Replace a Water Heater Anode Rod

SANTA CRUZ — One of the most crucial components of a water heater is its sacrificial anode rod. Made from magnesium, aluminum or aluminum/zinc alloy, this rod serves one function: to attract and absorb corrosion and divert it away from the water heater tank (hence the qualifier “sacrificial”). However, even though it protects a water heater from rust, an anode rod can stop working after years of sustained subjection to corrosive activity, which is why it’s important to replace it on a regular basis (every four to five years).

Fortunately, this is a maintenance task you can perform yourself. After shutting off the water to your water heater and disconnecting the supply line, use a pair of pliers to unscrew and remove the anode rod. Typically, the hexagonal head of the rod will be visible at the top of the water heater (if you have trouble locating it, consult your owner’s manual). Once the old rod is out, you can drop in the new one and tighten it in place with your pliers before reconnecting the supply line and turning the water back on.

Since corrosion is a common cause of water heater failure, anode rod replacement is just as important as annually draining and flushing the tank. Most notable is the effect on longevity—proactive anode rod replacement can substantially extend and even double a water heater’s expected lifespan.

A Thorough Procedure for Preventing Carpet Stains

A Thorough Procedure for Preventing Carpet Stains

CONCORD — Spills on the carpet are never anticipated, but knowing what to do in the event of one can help you prevent a permanent stain. Follow this thorough stain prevention procedure:

1. With a tightly folded, 100 percent cotton towel, begin blotting the affected area. Why 100 percent cotton? Because cotton is the most absorbent material—much more so than nylon carpet. As you blot (don’t scrub, it’ll only spread the stain), rotate the towel as each section becomes inundated with liquid. Depending on how much liquid there is, you might need a second towel.

2. Once you’ve reached a point where your towel ceases to absorb liquid, take some table salt and spread a generous amount over the area. Gently rub your hand over the carpet fibers to further spread the salt. After letting the salt sit for 15 minutes, run your vacuum over the area to remove it.

3. Using a simple mixture of one part white distilled vinegar, two parts water and a splash of dishwashing liquid, wet a new towel and blot the affected area. Keep an eye out for color transfer—it’ll tell you if your towel is still picking up anything from the carpet.

4. When you see you’re no longer getting any color transfer, place a dry cotton towel over the affected area and put something heavy on top of it (equivalent to the weight of a 1-gallon water jug). A plastic container works best; don’t use wood or metal containers, as they can potentially stain the carpet themselves. Leave that to set for at least an hour, allowing it to absorb any remaining residue in the carpet. Finally, after letting the carpet sit for 24 hours, run a vacuum over the area to reinvigorate the fibers.

The Best Technique for Maintaining Your Carpet

The Best Technique for Maintaining Your Carpet

SAN MATEO — When it comes to maintenance of any kind, it’s often the minor proactive steps that make the biggest difference in terms of maximizing performance and avoiding problems. This is certainly true for carpet care—while supplementary measures such as professional cleanings are important, it’s the most basic steps that go the furthest toward promoting a carpet’s long-term beauty and integrity.

The best technique for maintaining a carpet is simple: vacuum often (at least once a week). Over time, airborne dust and dirt particles accumulate within a carpet’s fibers. When combined with moisture, these particles take on a clay-like texture and get embedded in the fibers, which makes them difficult to remove. By vacuuming regularly, you can suck up dirt before it has a chance to gain a foothold, thus preventing damage and the need for supplementary cleaning measures.

Keeping Track of Home Maintenance Needs

Keeping Track of Home Maintenance Needs

PALO ALTO — A lot of homeowners are unaware that their houses, whether new or old, won’t last forever. They don’t seem to realize that nearly every component of the home (and there are thousands) has a finite shelf life. Eventually, these components will wear out, get old and fail, while in other cases they may just fall out of fashion.

Small items that fail aren’t usually a big deal…if you can catch them early and attend to them right away. Big components that fail are another matter. Plumbing, water heaters, roofing, gutters, windows, doors, siding, and foundations that wear out and fail can cost thousands of dollars to repair or replace.

I recommend learning the ages and expected lifespans of the various key parts of your home. From there, you can project when major expenses are likely to occur and plan accordingly. If you need help with this, a home maintenance professional can be a great resource.

How to Fix a Jammed Garbage Disposal

How to Fix a Jammed Garbage Disposal

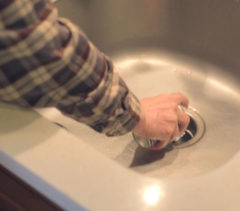
EL CERRITO — One of the most common plumbing problems in the kitchen is a clogged or jammed garbage disposal. You may assume this requires the assistance of a plumber, but in many cases, you can easily resolve the problem yourself.

First, check if the disposal merely needs to be reset by pressing the red “reset” button at the bottom of the unit and testing it again. If it still doesn’t work, you’ll need to manually “unjam” it.

Most people don’t realize that garbage disposals come with tools that are specifically designed to unblock jams. Usually, this tool is located in a small compartment beneath the unit. However, if you’ve lost your tool, a simple quarter-inch Allen wrench will serve the same purpose.

Before attempting to unjam your disposal, make sure the power is shut off, whether by unplugging it or turning off the breaker. Insert your tool into the appropriate slot (located in the center of the unit’s underside) and rotate it back and forth. This motion will turn the disposal’s grinding unit, which will help dislodge anything that’s caught in the teeth. After removing the tool, restore power to the device, run the faucet and turn on the disposal. You may need to hit the reset button again, as its automatic shut-off may have been triggered.

If you don’t have a tool that fits into the disposal’s slot, try using a broom handle. Spray some WD-40 into the disposal to loosen it up, insert the broom handle and crank it around manually. Restore power to the unit, turn the water on and test it again.

Protecting Your Shower Doors

Protecting Your Shower Doors

SAN FRANCISCO — One of the most common complaints regarding shower doors is the difficulty involved in keeping them clean. Most people don’t realize there’s a reason this is so difficult: Glass is porous, just like our skin. When the pores in a glass shower door are compromised by contaminants, it makes the glass harder to clean and leads to issues with corrosion and water stains.

Fortunately, there are products that address the difficulty of maintaining shower doors. One is called “Diamond Seal,” a polymer coating that’s applied to the interior of the shower glass. Diamond Seal gets into the pores of the glass so contaminants can’t, which makes cleaning easier and less frequent and consequently helps prevent water stains.

While Diamond Seal can protect your existing shower door against contamination, if you’re installing a new shower door, it’s worthwhile to consider ShowerGuard® glass. Similarly to Diamond Seal, ShowerGuard protects against contamination, but instead of being a liquid solution that’s applied externally, the formula is actually baked onto the glass itself to provide permanent protection against corrosion and staining.

Avoiding Problems When Cleaning Your Stovetop

Avoiding Problems When Cleaning Your Stovetop

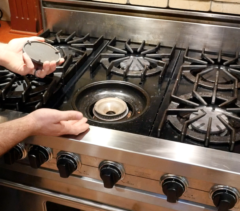
COTATI — Cleaning your stovetop may seem like a simple task, but if you aren’t careful, you can accidently cause problems with its functionality. In particular, you need to prevent moisture from getting into the wrong places. For example, if the stove’s burners get exposed to too much cleaning solution, they can cease to function until they dry. Additionally, if moisture gets behind the control knobs, it can potentially affect the electrical components directly behind them.

To prevent these types of problems, it’s important to use the right amount of cleaner on your stovetop and apply it correctly. Rather than spraying the cleaning solution directly onto the stovetop, spray it onto the cloth you’re using to wipe it down. Also, don’t oversaturate the cloth; if it’s very moist, you should dry off burners and other sensitive areas after cleaning them.

DIY Water Heater Maintenance

DIY Water Heater Maintenance

NOVATO — A crucial aspect of plumbing system maintenance is to drain your water heater’s tank at least once a year. This is important because of all the sediment in the water, which tends to collect and sit at the bottom of the tank. If you don’t flush the tank regularly, your water heater will gradually become less efficient and may even develop a leak at its base.

Fortunately, flushing your water heater’s tank isn’t difficult. Just follow these steps:

1. Shut off water to the unit. Locate the shut-off valve (usually on top of the tank) and turn it to the “off” position (since it’s already “on,” just turn it all the way in the opposite direction).

2. Turn on the hot water to a faucet in your house. This will prevent the water line from becoming air locked as you drain the tank.

3. Connect a garden hose to the hose bib at the bottom of the tank and extend it all the way outside to your garden or driveway. Open the valve to let the water drain out (you may need a screwdriver for this). Make sure there aren’t any kinks in the hose and the water is draining correctly.

4. Open the temperature and pressure (T&P) valve on the side of the tank; this will create air in the system and help push the water out.

5. Wait 10 to 15 minutes and look at the color of the water. At first, the water will come out milky due to all the sediment, but after a while it should clear up. Once you see the water is coming out clear, proceed to the next step.

6. To finish, turn off the drain valve and the T&P valve, disconnect the drain hose and turn on the cold water supply. To prevent the line from becoming air locked while the tank is refilling, leave the faucet on inside your house until it’s refilled (better yet, turn on the hot water to a few more fixtures). Once the water starts coming out of your faucets again, you should be good to go.

Tankless Water Heater Maintenance

Tankless Water Heater Maintenance

SANTA ROSA —It’s well known that traditional water heaters need to be flushed regularly, but few people realize this is also necessary for tankless water heaters. In fact, it’s even more important for tankless units because they have a higher susceptibility to issues caused by mineral buildup. By keeping the inner pipes clear of buildup, routinely flushing your tankless water heater will prolong its operating lifespan.
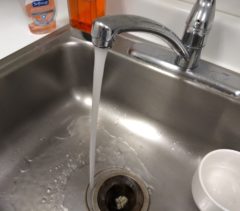
You should flush your tankless water heater at least once a year, but if your home has hard water, you may need to do it more frequently. If you don’t want to flush your water heater as often, consider installing a whole-home water filter. By filtering water as it enters your home, this product can remove many of the minerals and corrosive elements before they get to your water heater.

Whether you have a plumber flush your tankless water heater or you do it yourself, don’t skip this crucial maintenance step—not only is it important for keeping your water heater functioning properly, it’s a warranty requirement.

Garage Door Maintenance

Garage Door Maintenance

SAN JOSE — Like any mechanical device, a garage door has a lot of moving parts that require periodic maintenance. Fortunately, maintenance is pretty simple for a garage door. All you need to do is lubricate its rollers, hinges and other moving parts with a white lithium or silicon spray. By doing this twice a year, you’ll keep your garage door operating smoothly, as well as extend its lifespan and avoid costly repairs.

Keep in mind that if your garage door makes a lot of noise while opening and closing, this should raise a red flag. Lubrication may not always do the trick, so if your door is still noisy despite ongoing maintenance, call your local garage service company to schedule a professional assessment.

An Important Dryer Maintenance Measure

An Important Dryer Maintenance Measure

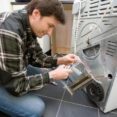
OAKLAND — Have you noticed that your dryer isn’t working as well as it used to? Is it taking longer to dry your clothes? Is your dried laundry full of loose lint? Believe it or not, these issues can all stem from a clogged lint filter.

When a dryer’s lint filter isn’t cleaned between loads, it can inhibit operating efficiency and result in longer drying times. Plus, when the filter is full, it can’t properly capture lint, which will instead end up all over your freshly dried clothes.

What’s more, cleaning your lint filter is an important safety measure. Every year, thousands of house fires are caused by dryers, and a good number of these result from clogged lint filters. So, don’t let this happen to you—clean your dryer’s lint filter after each load.

Watch This

How to Maintain Your Water Heater

Kyle Barnhart of Mike Testa Plumbing, Inc. discusses how to keep your water heater in excellent working order.

Shares